
Programming your Genie 3-button remote ensures seamless garage door operation, offering convenience and security. This guide provides step-by-step instructions for setup and troubleshooting to ensure optimal performance and security.
1.1 Overview of the Genie 3-Button Remote
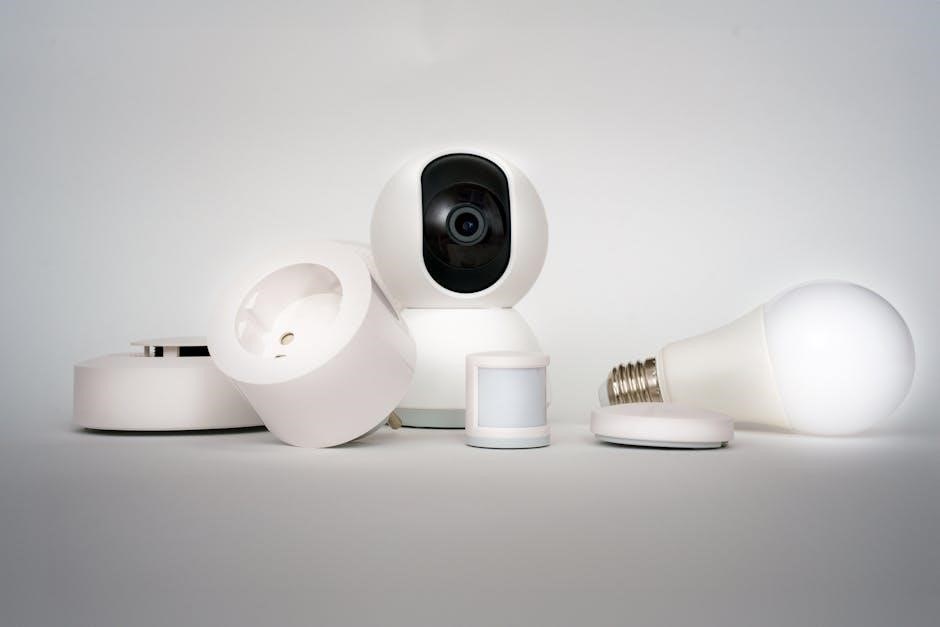
The Genie 3-button remote is a versatile and user-friendly device designed to control garage door openers efficiently. It features three buttons, allowing operation of up to three different garage doors or other compatible devices. The remote incorporates advanced technologies like IntelliCode Security and Auto-Seek Dual Frequency, ensuring secure and reliable performance. Its compact design makes it easy to carry, while the intuitive layout simplifies operation. The remote is compatible with various Genie garage door openers, including the SilentMax Connect model, which offers Wi-Fi connectivity for smart home integration. With voice control compatibility and a focus on durability, the Genie 3-button remote provides a seamless and modern garage door operation experience.
1.2 Importance of Proper Programming
Proper programming of the Genie 3-button remote is essential for ensuring secure, reliable, and efficient garage door operation. Correct programming prevents unauthorized access, as it establishes a unique connection between the remote and the garage door opener. This reduces the risk of security breaches and ensures that only authorized users can operate the door. Additionally, proper programming enhances the remote’s functionality, allowing it to work seamlessly with advanced features like IntelliCode Security Technology and Auto-Seek Dual Frequency. Improper programming can lead to malfunctions, intermittent performance, or even complete system failure. By following the correct steps, users can enjoy a hassle-free experience, knowing their garage door operates securely and efficiently. Proper programming also ensures compatibility with smart home systems and voice control features, making it a crucial step for modern garage door management.
1.3 Brief History of Genie Garage Door Openers
Genie garage door openers have a long-standing reputation for innovation and reliability. Founded in the 1950s, Genie became a pioneer in garage door opener technology, introducing the first mass-produced opener. Over the years, Genie has evolved to meet changing consumer needs, incorporating advanced features like remote controls and smart home integration. The development of the 3-button remote marked a significant milestone, offering users greater convenience and control. Genie’s commitment to innovation has led to the creation of Wi-Fi-enabled openers, such as the SilentMax Connect, which allows users to operate their garage doors via smartphones or voice commands. This history of continuous improvement ensures Genie remains a trusted name in garage door technology, blending tradition with modern advancements to enhance user experience and security.
Preparation for Programming
Gather materials like the remote, garage door opener, and instructions. Understand the remote layout, including buttons for programming and operation. Ensure safety by clearing the area and following precautions.
2.1 Gathering Necessary Materials
To begin programming your Genie 3-button remote, gather all required materials. This includes the remote itself, the garage door opener, and the instruction manual. Ensure you have a ladder or step stool for accessing the opener if needed. A small screwdriver may be necessary for battery replacement or adjusting settings. Verify that the remote has functional batteries, as dead batteries can hinder the programming process. Additionally, clear the area around the garage door to prevent accidents during testing. Having all materials ready ensures a smooth and efficient setup process. Proper preparation minimizes delays and ensures accurate programming of your Genie remote for reliable garage door operation.
2.2 Understanding the Remote Layout
Familiarizing yourself with the Genie 3-button remote layout is essential for effective programming. The remote typically features three buttons: one for opening the garage door, one for closing it, and a third for turning on the garage light. These buttons are usually labeled clearly or marked with universal symbols. The remote may also include an LED indicator that lights up during programming or when a button is pressed, confirming button functionality. Understanding the button functions ensures accurate programming and operation. Additionally, the remote may have a battery compartment on the back, which can be opened with a small screwdriver. Knowing the layout helps in navigating the programming process efficiently and troubleshooting issues quickly. Proper understanding of the remote’s design enhances overall user experience and ensures smooth garage door operation.

2.3 Safety Precautions
Before programming your Genie 3-button remote, ensure a safe environment to avoid accidents. Clear the area around the garage door to prevent injury or damage. Avoid programming the remote while operating the garage door, as this could lead to unintended movement. Keep the remote out of reach of children to prevent accidental activation. Wear safety gloves if handling small parts or tools. Ensure the garage door is closed and secure before starting the programming process. If you notice any unusual behavior during programming, stop immediately and consult the user manual or contact a professional. Always test the remote after programming to ensure proper function. Following these precautions ensures a safe and successful programming experience.
Programming Steps
Programming your Genie 3-button remote is straightforward, ensuring secure and reliable garage door operation. Features like IntelliCode Security and Auto-Seek Dual Frequency enhance security and connectivity. The SilentMax Connect model integrates with smart home systems and voice control for convenience.
3.1 Erasing Previous Codes
Erasing previous codes is essential to ensure your Genie 3-button remote operates securely and efficiently. This step removes any outdated or conflicting codes stored in the remote. To begin, locate the learn button on your garage door opener, typically found near the motor unit. Press and hold this button until the indicator light turns off, indicating the old codes have been cleared. This process ensures that only the new code you program will control your garage door. By clearing previous codes, you prevent unauthorized access and potential interference from old signals. This step is crucial for maintaining the security and reliability of your garage door system. Always perform this step before programming new codes to avoid any issues during the setup process.
3.2 Entering Programming Mode
Entering programming mode is a critical step in setting up your Genie 3-button remote. Start by pressing and holding the learn button on your garage door opener until the indicator light illuminates. This action initializes the opener’s programming mode. Next, press and release the desired button on your remote control to sync it with the opener. The light will blink, confirming the connection. If using multiple buttons, repeat the process for each one. Ensure the remote is within range of the opener during this process. This step establishes communication between the remote and the opener, enabling the remote to send signals. Proper synchronization ensures smooth operation and prevents interference from other devices. Once completed, the remote will be ready to control your garage door securely and efficiently.
3.3 Pairing the Remote with the Garage Door Opener
After entering programming mode, press and release the remote button you wish to use for opening or closing the garage door. The opener’s indicator light will flash, signaling successful pairing. This step establishes a secure connection between the remote and the opener using IntelliCode Security Technology, which generates a unique access code for each use. Ensure the remote is within range of the opener during this process. Once paired, test the remote by pressing the button to confirm the garage door responds. This step ensures the remote is properly synchronized and ready for use. The Auto-Seek Dual Frequency Technology enhances signal strength, ensuring reliable communication between the remote and opener. Proper pairing is essential for smooth operation and security.

3.4 Testing the Remote
After pairing, test the remote to ensure proper functionality. Press each button to confirm the garage door opener responds accurately. Verify that the door opens, closes, and stops as expected. Check the remote’s range by testing it from various distances to ensure consistent performance. If the door doesn’t respond, recheck the pairing process or adjust the opener’s sensitivity. The IntelliCode Security Technology ensures a secure connection, while the Auto-Seek Dual Frequency Technology enhances signal strength. Testing confirms the remote is correctly programmed and ready for daily use. If issues arise, refer to the troubleshooting section or consult the user manual for further assistance. Proper testing ensures reliable operation and peace of mind.
3.5 Exiting Programming Mode
After successfully pairing the remote, exit programming mode to ensure the garage door opener returns to normal operation. Press and hold the program button on the opener until the LED light turns off, indicating programming mode has been exited. Release the button and test the remote to confirm functionality. The IntelliCode Security Technology will now securely manage access codes, while the Auto-Seek Dual Frequency Technology ensures strong signal connectivity. If the opener does not respond, repeat the process or consult the user manual. Properly exiting programming mode prevents unintended reprogramming and maintains system security. Once exited, the remote is ready for daily use, offering reliable control over your garage door. Always ensure the opener is out of programming mode to avoid accidental code resets or unauthorized access.

Troubleshooting Common Issues
Common issues with the Genie 3-button remote include non-response, incorrect functionality, or pairing problems. Check battery connections, ensure proper alignment, and reset or reprogram the remote if necessary.
4.1 Remote Not Responding
If your Genie 3-button remote isn’t responding, start by checking the battery connections. Ensure batteries are installed correctly and not depleted. Next, verify that the remote is in range and there are no obstructions between the remote and the garage door opener. Check for any physical damage to the remote or the opener’s sensors. If issues persist, try resetting the remote by removing the batteries for 30 seconds and reinstalling them. Finally, reprogram the remote by following the pairing process outlined in the programming steps. If none of these solutions work, the remote may need replacement or professional assistance.
4.2 Incorrect or Intermittent Functionality
If your Genie 3-button remote exhibits incorrect or intermittent behavior, check the battery strength and ensure no physical obstructions block the signal. Verify that the remote is properly paired with the opener by reprogramming it using the steps outlined in the programming section. If issues persist, inspect for interference from nearby devices emitting similar frequencies. Test the remote closer to the opener to confirm signal strength. Ensure the opener’s sensors are clean and aligned. If the remote still malfunctions, reset it by removing the batteries for 30 seconds and reinstalling them. Finally, reprogram the remote to establish a fresh connection. If problems remain, consider updating the opener’s firmware or consulting a professional for assistance.
4.3 Resetting the Remote
Resetting your Genie 3-button remote can resolve persistent issues. Start by removing the batteries and pressing all buttons for 5 seconds to discharge any stored power. Reinstall the batteries and test the remote. If it still doesn’t function, reset the remote by pressing and holding the “Learn” button on the opener until the LED blinks. Release and press the remote’s buttons to reprogram. Ensure the remote is within range and free from interference. If issues persist, clear the opener’s memory by unplugging it, pressing the “Learn” button, and plugging it back in. Reprogram the remote following the initial setup steps. This process ensures a clean slate for proper functionality. Always refer to the programming section for detailed reprogramming instructions after a reset.
Security Features
Genie remotes utilize IntelliCode, Auto-Seek Dual Frequency, and Rolling Code technologies to ensure secure, interference-free operation, safeguarding your garage door from unauthorized access and signal theft.
5.1 IntelliCode Security Technology
IntelliCode Security Technology is a advanced feature designed to enhance garage door opener security. It generates a new access code every time the remote is used, ensuring that the same code cannot be captured and reused by unauthorized individuals. This rolling code system prevents potential hacking and unauthorized access, providing an additional layer of protection for your garage door. The technology is integrated into Genie garage door openers and remotes, making it a seamless and reliable security solution. By constantly changing the access code, IntelliCode ensures that your garage door remains secure, even in the face of advanced hacking attempts. This feature is particularly important for homeowners who prioritize security and want to safeguard their property from potential breaches.
5.2 Auto-Seek Dual Frequency Technology
Auto-Seek Dual Frequency Technology enhances the reliability and performance of your Genie garage door opener by utilizing two distinct frequencies to ensure a strong, stable connection. This advanced system automatically seeks and selects the optimal frequency, minimizing interference from other devices. By switching between frequencies as needed, it ensures consistent communication between the remote and the garage door opener, reducing the likelihood of failed commands. This technology is particularly beneficial in environments with high levels of wireless interference, such as homes with multiple smart devices. The dual-frequency capability provides a robust and dependable connection, ensuring your garage door operates smoothly and efficiently every time. This feature is a key component of Genie’s commitment to delivering reliable and secure garage door solutions for homeowners.
5.3 Rolling Code Technology
Rolling Code Technology, also known as hopping code, is a security feature that changes the access code each time the remote is used, ensuring unauthorized users cannot capture and reuse the code. This technology enhances security by creating a new, unique code for every activation, making it nearly impossible for hackers to intercept and replicate. The system uses a complex algorithm to generate these codes, providing an additional layer of protection for your garage door. By eliminating the risk of code grabbing, Rolling Code Technology ensures that only authorized remotes can control the garage door opener. This feature is seamlessly integrated into Genie’s systems, offering homeowners peace of mind and advanced security for their property. It is a critical component of Genie’s commitment to delivering secure and reliable garage door solutions.

Advanced Features
The Genie 3-button remote offers advanced features like Wi-Fi connectivity, voice control, and smart home integration, enhancing convenience and modernizing garage door operation for users seamlessly and effortlessly.
6.1 Multi-Door Control
The Genie 3-button remote allows users to control multiple garage doors seamlessly. This feature is ideal for homes with more than one garage door, enabling easy access and operation from a single device. By programming each button to correspond with a specific door, users can open, close, or monitor each door independently. This functionality enhances convenience, especially for homeowners with large properties or multiple garages. The remote’s multi-door control capability streamlines daily operations, reducing the need for multiple remotes. With this feature, users can effortlessly manage their garage doors, ensuring smooth and efficient access. This advanced capability makes the Genie 3-button remote a practical solution for modern households with diverse garage door needs.
6.2 Integration with Smart Home Systems
The Genie 3-button remote can integrate seamlessly with smart home systems, enhancing convenience and control. By connecting to platforms like Apple HomeKit or Google Home, users can operate their garage doors using voice commands or smartphone apps. This integration allows for remote monitoring and control, ensuring users can check the status of their garage doors from anywhere. The Genie SilentMax Connect, for instance, offers Wi-Fi-enabled operation, making it compatible with smart home ecosystems. This feature not only modernizes garage door operation but also adds an extra layer of security and accessibility; With smart home integration, users can effortlessly manage their garage doors alongside other smart devices, creating a unified and efficient home automation experience. This advanced functionality makes the Genie remote a versatile tool for tech-savvy homeowners seeking streamlined control over their property.
6.3 Voice Control Compatibility

The Genie 3-button remote is compatible with voice control systems, allowing users to operate their garage doors hands-free. By integrating with platforms like Google Assistant or Amazon Alexa, homeowners can open, close, or check the status of their garage doors using simple voice commands. This feature enhances convenience, especially for those with busy lifestyles or limited mobility. The Genie SilentMax Connect model, for example, supports voice control through its Wi-Fi-enabled technology. To set this up, users typically link their Genie account to their smart speaker platform, enabling seamless voice commands. This advanced feature not only modernizes garage door operation but also integrates smoothly with other smart home devices, offering a futuristic and efficient way to manage home security and accessibility. Proper setup and a stable internet connection are essential for reliable voice control functionality.

Maintenance Tips
Regular maintenance ensures optimal performance. Replace batteries annually, clean buttons with a soft cloth, and update firmware periodically for enhanced functionality and security.

7.1 Battery Care and Replacement
Proper battery care is essential for maintaining your Genie 3-button remote’s performance. Always use high-quality alkaline batteries to ensure reliable operation. Check battery voltage regularly, as low voltage can cause intermittent functionality. Avoid mixing old and new batteries, as this may reduce performance. Clean the battery terminals with a soft cloth to prevent corrosion. Store spare batteries in a cool, dry place to maintain their longevity. Replace batteries every 1-2 years or when you notice a decrease in range or response time. Proper disposal of old batteries is also important for environmental safety. By following these tips, you can ensure consistent and optimal performance from your remote control.
7.2 Cleaning the Remote
Cleaning your Genie 3-button remote regularly ensures optimal functionality and longevity. Start by turning off the remote and gently wiping its surface with a soft, dry cloth to remove dirt or debris. For stubborn stains, lightly dampen the cloth with water, but avoid getting moisture into the buttons or openings. Never use harsh chemicals, abrasive cleaners, or excessive water, as these can damage the remote’s electronics. Pay special attention to the buttons, ensuring they are free from grime that might interfere with their responsiveness. Allow the remote to air dry completely before using it again. Regular cleaning prevents wear and tear, ensuring your remote remains responsive and reliable over time.
7.3 Updating Firmware
Updating the firmware of your Genie 3-button remote ensures you have the latest features, security patches, and performance improvements. To update, connect the remote to a computer or smartphone via the appropriate cable or app. Download the newest firmware from the official Genie website or through a compatible app. Follow the on-screen instructions carefully to complete the update process. Avoid interrupting the update, as this could cause malfunctions. Once done, test the remote to ensure all functions work correctly. Regular firmware updates enhance security, improve responsiveness, and add new functionalities, keeping your remote operating at its best. Always use official sources for updates to avoid potential risks. This step is crucial for maintaining optimal performance and compatibility with your garage door opener system.
Programming your Genie 3-button remote enhances convenience, security, and ease of use. Follow the instructions carefully to ensure proper functionality and troubleshoot any issues promptly for long-term reliability.
8.1 Summary of Key Points

Programming a Genie 3-button remote involves erasing old codes, entering programming mode, and pairing the remote with the opener. Ensure the remote is correctly aligned with the opener during setup. Testing the remote after programming is crucial to confirm functionality. Troubleshooting common issues like non-response or intermittent operation can often be resolved by resetting the remote or reprogramming it. Regular maintenance, such as cleaning the remote and replacing batteries, ensures long-term reliability. Security features like rolling codes and dual-frequency technology enhance protection against unauthorized access. Advanced features, including multi-door control and smart home integration, offer added convenience. Always refer to the user manual for specific instructions tailored to your Genie model. Proper programming and maintenance ensure seamless and secure garage door operation.
8.2 Final Tips for Optimal Use
To maximize the performance of your Genie 3-button remote, ensure it is stored in a dry, cool place to prevent damage. Regularly clean the remote’s buttons to maintain responsiveness. Replace batteries promptly when low to avoid interrupted service. For enhanced security, utilize features like rolling codes and dual-frequency technology to prevent unauthorized access. Consider integrating your remote with smart home systems for voice control and remote access via your smartphone. Always test the remote after programming to ensure proper functionality. Keep the remote out of reach of children to avoid accidental door operation. By following these tips, you can enjoy reliable, secure, and convenient garage door control with your Genie 3-button remote.
8.3 Resources for Further Assistance
For additional support with your Genie 3-button remote, visit the official Genie website for detailed manuals and troubleshooting guides. The Genie customer support team is available via phone or email to address specific issues; Online forums and community discussions often provide user-shared tips and solutions. Authorized Genie dealers can offer hands-on assistance and genuine replacement parts. Ensure to refer to the user manual provided with your remote for model-specific instructions. Regularly check for firmware updates to keep your system secure and functional. If issues persist, consider consulting a professional technician. These resources will help you resolve any challenges and maintain optimal performance of your Genie 3-button remote.